During an Apple Push certificate migration, you can unassign zero-touch iPhones and iPads in Apple Business and assign them back, as an alternative to erasing them when you return to the original certificate. It is not the recommended route: the standard way to move these devices is described in Move devices to the kept certificate. Use this page only if Primo support suggests it for your case.

Choose the right action in Apple Business

In Apple Business, taking a device away from Primo means Unassign Device Management. It never means Release from Organization.
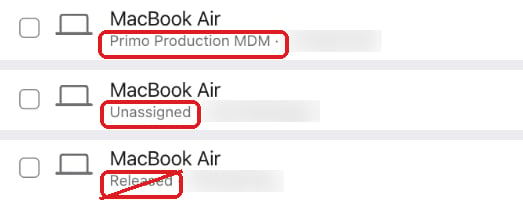
Apple Business Inventory: one device assigned to the Primo MDM server, one Unassigned, and one Released, crossed out
Never click Release from Organization. It cannot be undone: the device is no longer part of your organization. Getting it back means adding it to Apple Business again, through your reseller or Apple Configurator, which erases the device. The button sits right next to Unassign Device Management. If a confirmation mentions Release, cancel.

Unassign devices in Apple Business

1

Select the devices in Apple Business

Go to business.apple.com, sign in, and go to Devices > Inventory. Search for each device by serial number, then check its box. Under each device name, the list shows its MDM server, here Primo Production MDM: your Primo MDM server may have another name.
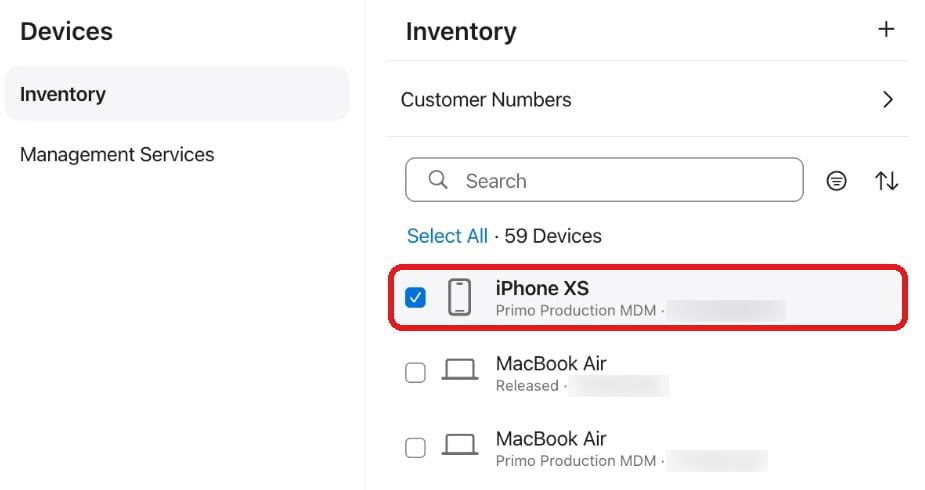
Apple Business Devices > Inventory: an iPhone assigned to the Primo MDM server is selected
Done when: every device to move is selected.
2

Click Unassign Device Management

In the device panel, click Unassign Device Management. Do not click Release from Organization, next to it.
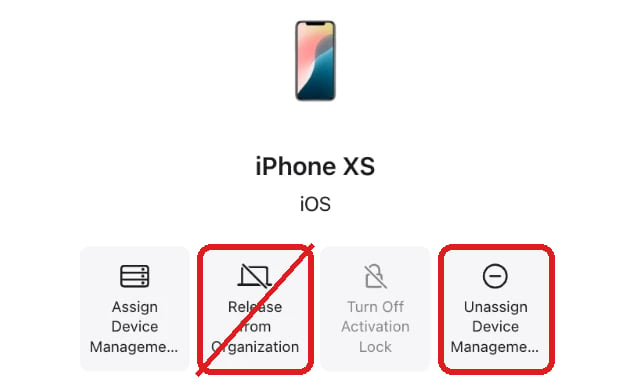
Apple Business device actions: Unassign Device Management is highlighted, Release from Organization is crossed out
3

Confirm with Unassign

The Unassign Device Management window asks you to confirm and shows how many devices are concerned, for example 1 Mac computer. Check that the count matches your selection, then click Unassign.
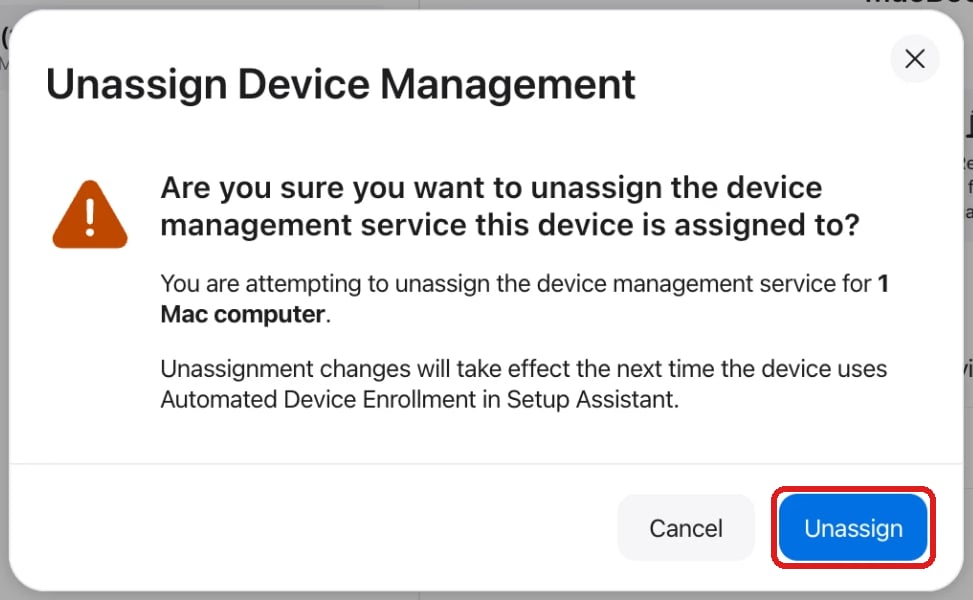
Unassign Device Management confirmation for 1 Mac computer, with the Unassign button highlighted
The window must mention unassigning the device management service. If it mentions Release, click Cancel.
4

Wait for the update

The Unassign Devices window shows the progress. The process continues if you close it, and you can follow it in Activity.
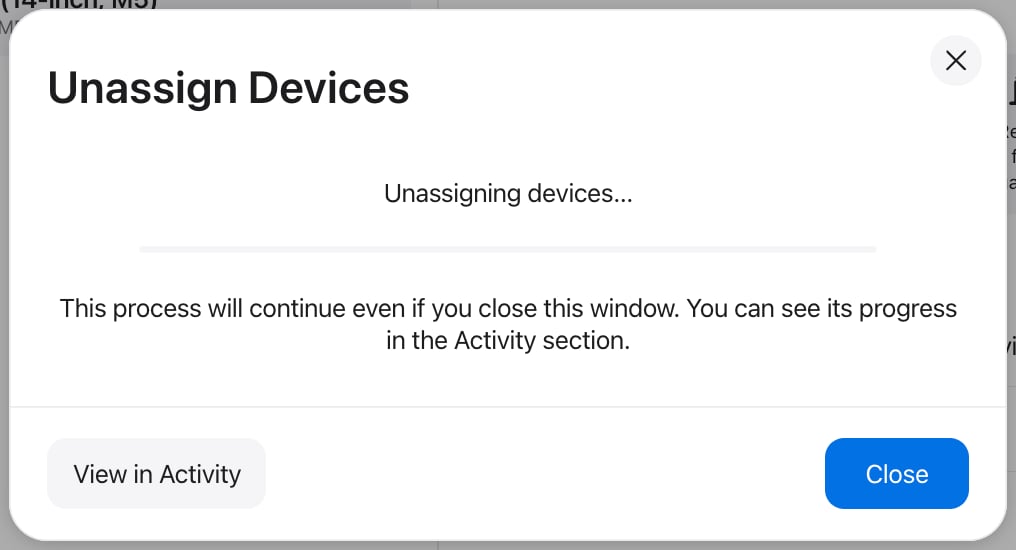
Unassign Devices window: unassigning devices, with View in Activity and Close
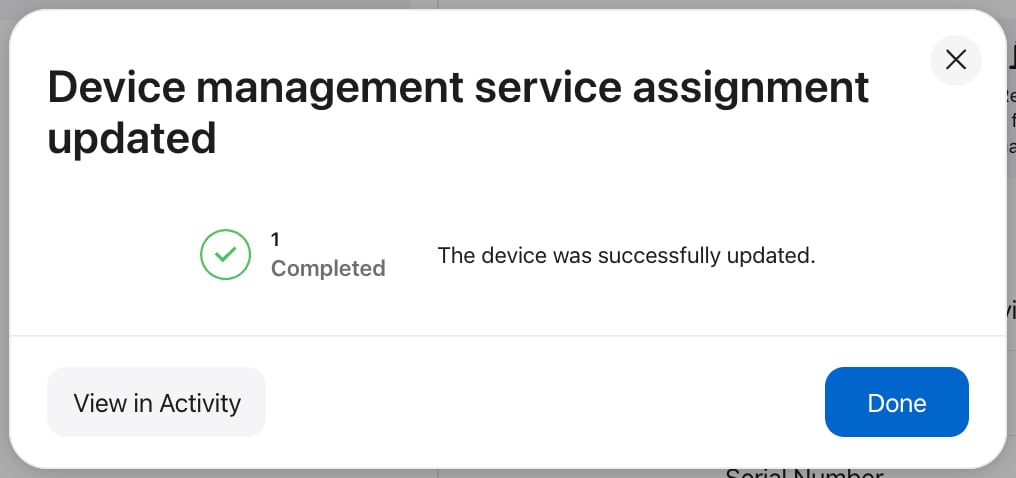
When it ends, Device management service assignment updated shows the number of devices completed. Click Done.
Device management service assignment updated: 1 Completed, the device was successfully updated
Done when: the completed count matches the number of devices you selected.
5

Check the result

In the list, each device to move now shows Unassigned under its name, and the device panel shows No Service next to Device Management Service. If a device shows Released, stop and contact Primo support before going further.
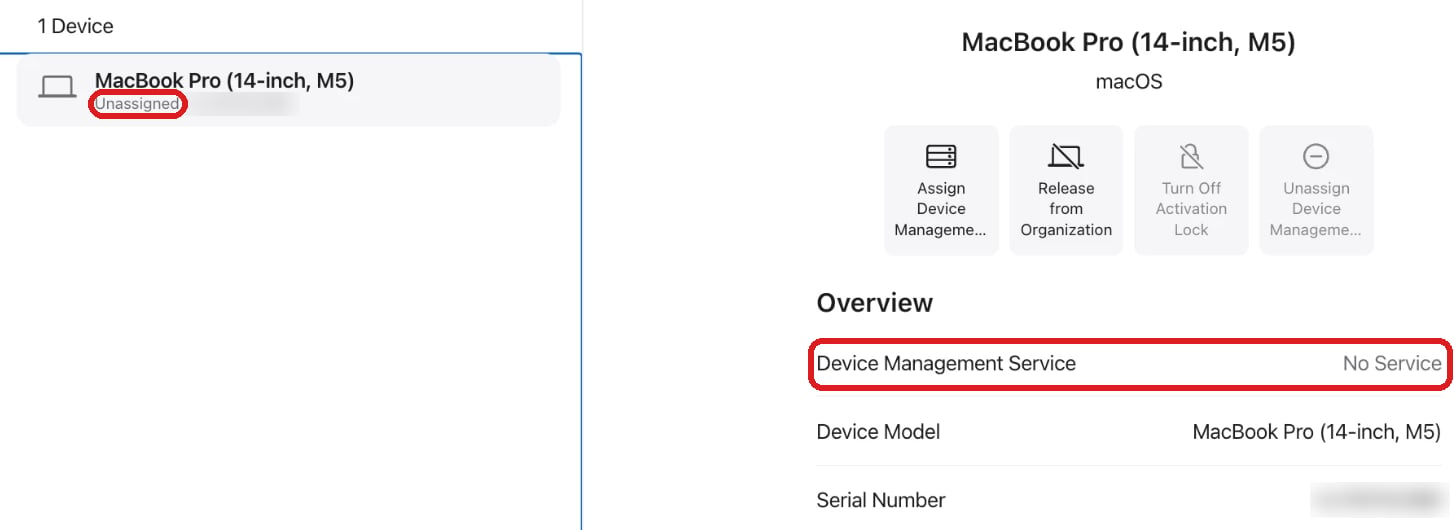
Apple Business Inventory: the Mac is shown as Unassigned, and its Device Management Service is No Service
Done when: every device you unassigned is still listed in Inventory and shows Unassigned.
Unassigning does not touch the device itself: Apple applies the change the next time the device uses Automated Device Enrollment in Setup Assistant. The device stays enrolled until MDM is turned off on it.

Reassign devices in Apple Business

Once the certificate you keep is installed, assign the devices back to your Primo MDM server.
1

Select the devices

In Devices > Inventory, select the devices that show Unassigned.
2

Click Assign Device Management

In the device panel, click Assign Device Management.
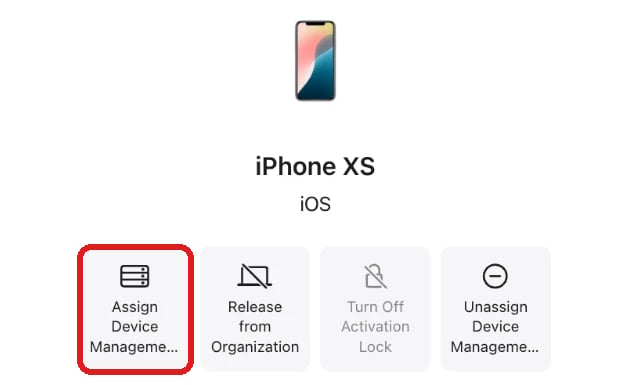
Apple Business device actions: Assign Device Management is highlighted
3

Choose your Primo MDM server

Under Device Management Service, choose your Primo MDM server, then click Continue.
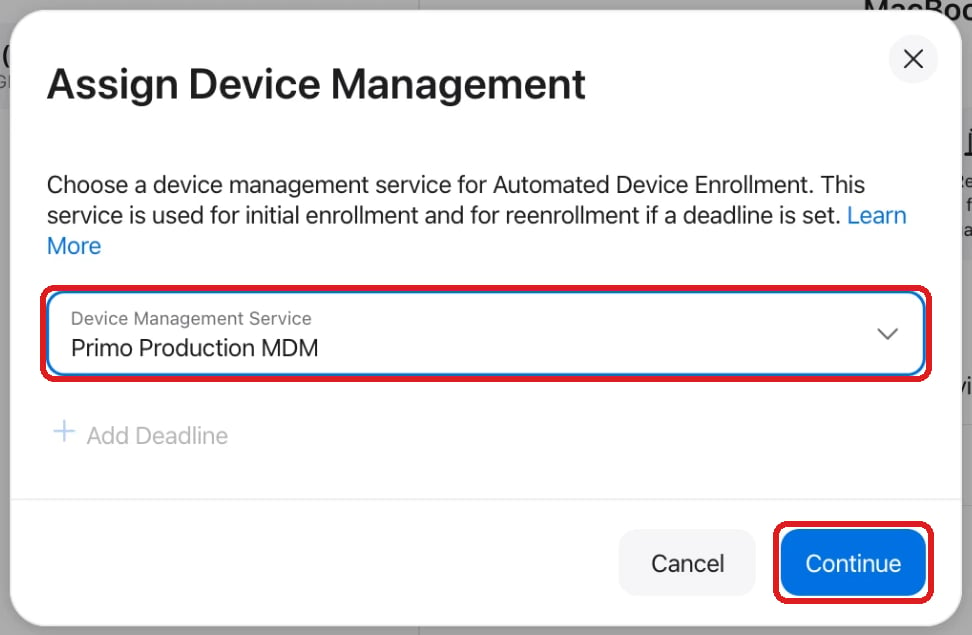
Assign Device Management window: the Primo MDM server is chosen as Device Management Service, and Continue is highlighted
Apple uses Add Deadline to force the re-enrollment of devices that are still enrolled. The moved devices are no longer enrolled in any MDM, so leave it empty unless Primo support tells you otherwise (to be confirmed).
4

Confirm the change

The Assign Device Management window asks you to confirm the change of device management service and shows how many devices are concerned. Check the count, then click Confirm.
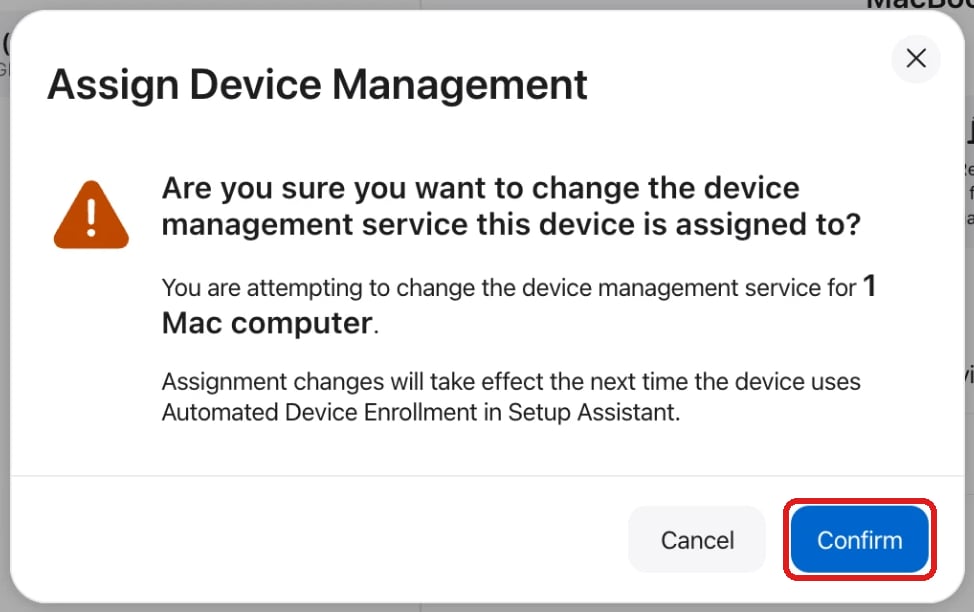
Assign Device Management confirmation for 1 Mac computer, with the Confirm button highlighted
The Assign Devices window shows the progress, then Device management service assignment updated shows the number of devices completed. Click Done.
5

Check the assignment

In the device panel, Device Management Service shows your Primo MDM server again.
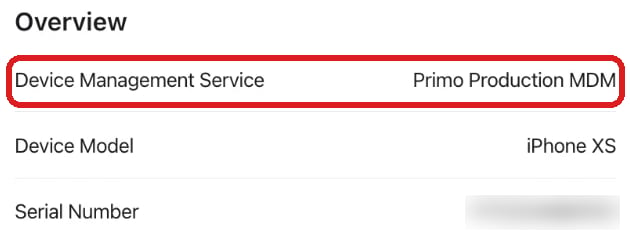
Apple Business device overview: Device Management Service shows the Primo MDM server
Done when: every moved device shows your Primo MDM server under its name.
Apple applies the assignment the next time the device uses Automated Device Enrollment in Setup Assistant. The device then re-enrolls on the installed certificate.

Contact

If a device shows Released, or you are unsure which action to take, contact support@getprimo.com with:
  • the serial numbers of the devices concerned
  • their status in Devices > Inventory
  • the name of your Primo MDM server in Apple Business